Ir al contenido principal

harry potter tutorial


Fig. 1

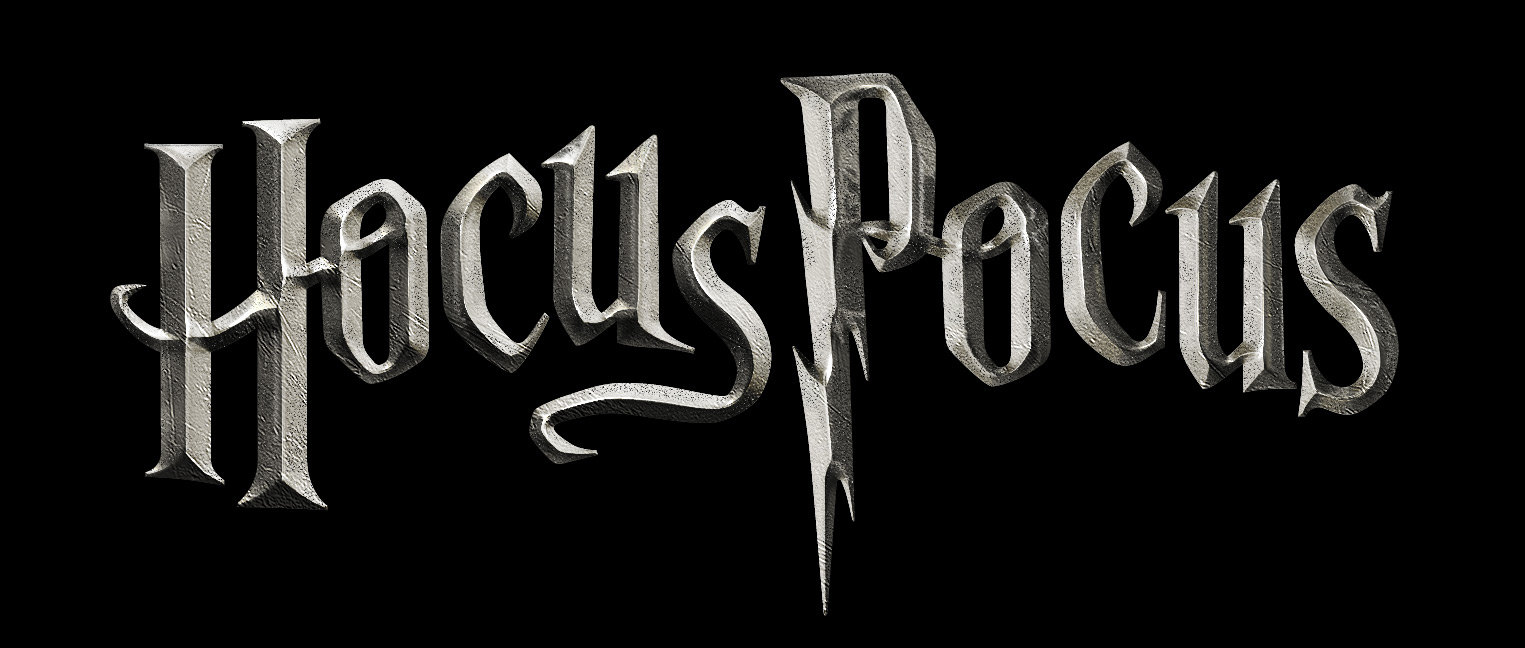
Step 1: Set up the Photoshop file and add the text

A) Install the Hocus Pocus font.

B) Launch Adobe Photoshop™ and create a new file with the dimensions you'll need. In this example, our file is 2109 x 648 with a black background.

C) Create a text layer and position the text in the center of the area:

  • Font: "Hocus Pocus Titles"
  • Text: "Hocus Pocus"
  • Color: 787878
  • Anti-aliasing method: Sharp
  • Kerning: adjust as needed

D) To add a lightning bolt to any capital letter, highlight the letter and change the font style to "Hocus Pocus Titles Alternate." In Figure 1, the capital "P" was altered in this manner.


Fig. 2

Step 2: Add dimension to the text

In this step, you will apply a bevel to different text layers to add a dimensional lighting effect. This effect will create the illusion that the titling is being lit by an unknown light source near the center of the letters.

A) Rasterize the text you create in Step 1 and rename the layer "Titles Left."

B) Copy the "Titles Left" layer, rename it "Titles Right."

C) With the "Titles Left" layer active, use one of the selection tools to select the right half on the titles. In our example, we selected the entire word "Pocus." Delete the area you've selected.

D) Repeat Step C with the layer "Titles Right, but select the left half of the titles and delete that portion.

In our example, "Hocus" is on the layer "Titles Left" and "Pocus" is on the layer "Titles Right."

E) Add a layer effect (Bevel and Emboss) to the "Titles Left" layer: (see Fig. 2)

  • Style: Inner Bevel
  • Technique: Chisel Hard
  • Depth: 351%
  • Direction: Up
  • Size: 8 px
  • Soften: 0 px
  • Shading Angle: 37°
  • Shading Altitude: 37°
  • Highlight Mode: Screen, Color: ffffff, Opacity: 75%
  • Shadow Mode: Multiply, Color: 000000, Opacity: 75%

F) Add a layer effect (Bevel and Emboss) to the "Titles Right" layer: (see Fig 3)

  • Style: Inner Bevel
  • Technique: Chisel Hard
  • Depth: 351%
  • Direction: Up
  • Size: 8 px
  • Soften: 0 px
  • Shading Angle: -173°
  • Shading Altitude: 48°
  • Highlight Mode: Screen, Color: ffffff, Opacity: 75%
  • Shadow Mode: Multiply, Color: 000000, Opacity: 75%


Fig. 3

Step 3: Create a rough metal texture

A) Merge the two layers and adjust the contrast to taste:


Fig. 4

B) Using the Brush tool (and any other tools you desire) add scratches, pits, highlights and other distressed features that you want to. This gives the text a more realistic, weathered effect. Click here for a close-up view of the painted details.


Fig. 5 - click image to enlarge

Step 4: Add a background & finishing touches

A) Create a new layer under the text, and add a desired background color or image. Your can use the custom illustration we created, or your own artwork.


Fig. 6 - click image to enlarge

B) OPTIONAL: To add a colored gradient that fades in at the bottom of the lettering, select the text layer and apply a layer effect (Gradient Overlay):

  • Gradient: Soft Light
  • Opacity: 100%
  • Gradient: Gradient Left color: 27536c, Right color: ffffff (white)
  • Style: Linear
  • Angle: 90°
  • Scale: 100%

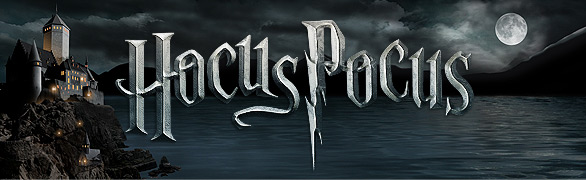
Your work file will now be similar in style to Figure 7.

Save your image and enjoy your new creation.


font :
Download

Comentarios

Entradas populares de este blog

discografia jeanette

Tomado del disco \"Sigo Rebelde\" año 1996. PicNic - 1968 01-Callate niña 02-No digas nada 03-El es distinto a tí 04-En mis noches 05-Te esperaré 06-San Francisco bay blues 07-Amanecer 08-Me olvidarás 09-No volverá 10-Oí tu voz 11-Negra estrella 12-Sola http://hotfile.com/dl/12724505/c5902a7/Pic_Nic-1968.rar.html Palabras, promesas-1970 01-Palabras, promesas 02-Amanecer 03-Que le han hecho a mi canción 04-No digas nada 05-Debajo del platanero 06-Soy rebelde 07-El es distinto a tí 08-Estoy triste 09-Escucha 10-Oye Mamá, oye papá http://hotfile.com/dl/12724454/2aa8720/Palabras2C_promeses-1973.rar.html Todo es nuevo-1977 01-Todo es nuevo 02-Canción para ana 03-El amor toca el violín 04-Recuerdame siempre 05-Love is blue 06-Los tiempos de mi papá 07-Si no voy a esperar 08-Manchester y liverpool 09-Pequeña preciosa 10-Jeremie 11-Mas buena que tú 12-Porqué voy a cambiar http://hotfile.com/dl/24966793/76765c3/Todo_es_nuevo-1977.rar.html Todo es nuevo en Francés http://www.4shared.co

Cómo pasar facilmente las páginas web abiertas en Safari a Chrome para iOS

From Evernote: Cómo pasar facilmente las páginas web abiertas en Safari a Chrome para iOS http://www.applesfera.com/applesfera-responde/como-pasar-facilmente-las-paginas-web-abiertas-en-safari-a-chrome-para-ios Copia esta porción de código tal cual sin cambiar una coma: javascript:location.href="googlechrome"+location.href.substring(4); Crea un favorito con esta o cualquier otra página para poder modificarlo a continuación. Abre los favoritos de Safari, pulsa sobre el botón Editar y selecciona el favorito que acabas de crear. Cambiale el nombre a algo como "Abrir en Chrome" o lo que prefieras. Borra la dirección URL de la página y pega el código que copiaste previamente. --

descargar videos de Tv3

From Evernote: descargar videos de Tv3 Fichero Descargar de TV3 (Versión 1.2-windows) (Versión 1.2) (Fichero exe - 3.48 MB) Descargar de TV3 (Versión 1.1-mac) (Versión 1.1) (Fichero dmg - 5.4 MB) ¿Qué es? Es un programita que te ayudará a descargar vídeos de TV3, de una forma sencilla y rápida, puesto que sólamente tendrás que indicarle la página del vídeo que te gusta. Instalación El fichero es un instalador completo, de momento sólo para Windows. Lo único que tienes que hacer es bajártelo y seguir los pasos que te indica para finalizar la instalación. Cuando lo ejecutes te pedirá dos cosas: URL del vídeo 3alacarta : Cuando estés viendo el vídeo que te gusta, copia la URL de la barra del navegador y pégala. Directorio de descarga : Indícale dónde quieres que se grabe el vídeo, y lo recordará para la próxima vez. El vídeo se graba con el título con el que aparece en la web. Código fuent